
Fabric panels are so versatile. A fabric panel plus imagination equals a great quilt.
It is so easy to fall in love with a magnificent fabric panel. Who can resist an animal grouping or a beautiful floral? Fabric panels are generally about 42″ usable width and 24″-36″ long, containing one large design with borders or several small framed designs. Almost every quilt shop or online store offers a variety of fabric panel designs.
For a quick quilting project, a panel may be perfect, but sometimes the print looks like too much design to incorporate into a quilt. It may not lend itself to being surrounded by your favorite quilt blocks.
And then there are some quilters who consider using fabric panels in quilts as cheating. They think a quilt made with a panel cannot be creative. I’m here to tell you that they are wrong!
When you use a fabric panel as a starting point for a quilt, and then allow yourself the freedom to change it, you are creating a one-of-a-kind quilt.
A horse panel was used in one of the samples shown here. Although this panel is no longer available, it is a good example of how you can create something unusual from a panel. You can try this technique with any panel from your fabric collection or from the latest panels available today.

Allow Yourself to Be More Creative by Pruning a Fabric Panel
Have you ever thought of just pruning the fabric panel to give yourself more creative license?
If you look up the word “prune” in the dictionary, it suggests “cutting off parts for a better shape or more fruitful growth.” Pruning the panel does just that — it provides a better shape for you to grow your project in a unique, appealing way.
Try Pruning a Fabric Panel!
In the fabric panel shown below, the border, some sky and grass were removed to make the wild horses stampede across the quilt. The panel became more elongated and horizontal with greater emphasis on the horses. Instead of the 42″ x 36″ panel I began with, it became a 30 1/2″ x 14 1/2″ panel.
It is important to extend the horse’s head, leg and tail beyond the 30 1/2″ measurement. By removing the superfluous matter, I could focus on the magnificent horses, and as I pieced the quilt, I allowed a horse’s head, leg and tail (plus 1/4″ for turning under) to spill over onto the added Nine-Patch blocks. The pruning also gave me pieces of the original panel to strategically place in the added Nine-Patch blocks, giving a pleasing color transition on the approximately 52″ x 62″ finished quilt.
Instead of horses confined by green/burnt orange borders, the horses have the “run of the quilt.”
So, buy that favorite panel you’ve been eyeing, and literally cut outside the box. Prune your panel and turn it into a truly original quilt.
Creating a Pruned Fabric Panel Quilt
The sample fabric panel was pruned to a 301/2″ x 141/2″ panel. By eliminating the first row of blocks and sashing strips above and below the panel shown in the Placement Diagram, this border design would work with a 301/2″ x 301/2″ panel.
Other fabric panel sizes may be used by moving units around, or by changing their sizes. That’s what makes pruning panels so much fun — their size can be changed in so many ways.
The following is a quick overview of how to make the sample horse quilt that can be used as an inspiration of how to prune the panel of your choice and grow your own panel-based quilt.
INSTRUCTIONS: Pruning Your Panel
Step 1. Select a fabric panel. Measure the length and width. Examine it with the idea that you want to change it in size to fit your needs and to make a unique quilt. Remember that the size should be divisible by a number that will make an even-sized block. Don’t prune the panel until you complete your plan. Note: Most of the blocks used in the quilt shown finish at 6″ square.
Step 2. Once you decide on a composition for your altered panel, grab a piece of graph paper and a ruler, and draw that size to scale. This will give you the starting point for your finished quilt.
Step 3. Next, plan how you want to expand on the panel to make a larger quilt. If your pruned panel is wider than it is long, you may need to add size to the top and bottom of the panel using pieced or plain sashing strips or blocks.
Referring to the Placement Diagram of the sample shown you will see that a 1″-wide (finished size) sashing strip was added to the top and bottom of the panel. Parts of the pruned panel were used to create squares to make the Star and Square-in-a-Square blocks in the block rows above and below the panel. Another set of 1″wide (finished size) sashing strips were added above and below these block rows.
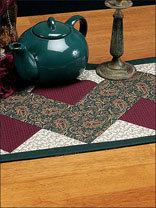
Step 4. Complete the graph-paper drawing, adding more blocks or strips to make a quilt that will fit your needs — a wall quilt, table runner, lap quilt or bed-size quilt.
Step 5. Figure out the sizes of the pieces to cut for each block or strip based on your graph-paper drawing. Using a clean drawing, add sizes to each section of the drawing, adding 1/2″ to each size to include a seam allowance.
Step 6. Select the fabrics for making the added blocks or strips. Choose colors that will match with the panel and some that will add contrast. For example, in the sample shown, parts of the trimmed panel were trimmed to make 2 1/2″ x 2 1/2″ squares, which were used in the Nine-Patch blocks that make rows around the panel.
Step 7. Figure out how many pieces and the sizes to be cut. For example, the sample uses 24 complete Nine-Patch blocks and four partial blocks that all use 2 1/2″ x 2 1/2″ squares. Each of the complete Nine-Patch blocks uses nine squares — nine times 24 equals 216, the number of squares needed to complete the Nine-Patch blocks. There are four units that have six 2 1/2″ x 2 1/2″ squares, adding 24 to the total. To complete all of these blocks you will need 240 (2 1/2″) squares.
Step 8. Once you have figured out everything you need and the sizes to cut, it’s time to cut everything, beginning with the panel. Trim it to size, leaving pieces to extend and spill over onto blocks or borders as described earlier.
Step 9. Complete the pieced units or blocks and stitch the units to the panel, leaving the extended parts loose. Press seams as you stitch.
Step 10. Turn under the edges of the extended panel elements and stitch in place to complete the top.
Step 11. Layer, quilt and bind.
Your Quilt Your Way
The head and part of a leg from the original horse panel were appliquéd to the surrounding Nine-Patch blocks. In this second sample, the lighthouse was trimmed from the original panel. Notice how it also is extended out into the borders. A second section has also been trimmed and placed (sailboat) outside of the borders. This gives a more dimensional look.
4 Responses to Prune Your Fabric Panel by Virginia Schaum