When creating a quilt, a border is used to hide the unsightly raw edges while adding a decorative finish. The finishing touch, borders are important in achieving the overall desired look of a quilt. Borders come in different styles, including squared corners and mitered corners. Squared corners feature straight edges along the sides, top, and bottom, whereas mitered corners meet at a diagonal, or bias. Mitered corners are a more advanced technique and are typically more desirable in today’s quilting world. With some accurate measuring and careful cutting, you will be pleased with the professional-looking results achieved when you miter a quilt’s corner. Many of our autumn quilting patterns would look stunning with a mitered corner.
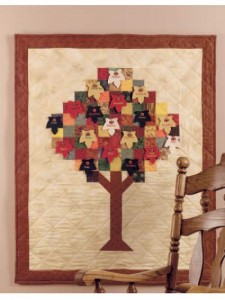
Click the Image to Download the Thanksgiving Tree Pattern
Miter a Quilt’s Corner Mitered borders are constructed from border pieces that meet at a diagonal, or a bias, rather than at a right angle. First, you need to measure the length of each border using an equation. This is the length of the side, plus twice the width of the border, plus six inches. If you are creating a quilt that is 16 inches long with a two-inch wide border, you’d want to cut a border length of twenty-six inches. Fold the border and quilt in half and mark the center of each. Line the centers up and pin these together. Next, sew the border to the top of the piece, stopping 1/4” away form the edge of the quilt, and then backstitch. Repeat this for each of the borders.
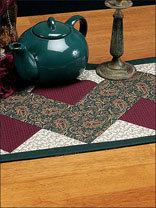
Click to download the Turning Leaves Pattern
You will now want to fold the quilt top in half, diagonally, with the right sides facing each other to create a triangle. Line two borders on top of each other with the fold running at a 45 degree angle between the two. Carefully line up the borders. Using a pencil and a ruler, extend the angle over the borders. Trace the angles onto the border and pin it to secure the borders. Begin sewing the border at the point you sewed the border to the top of the quilt. Sew from the stitch line out to the edge of the border, following the pencil line. Backstitch at the end and the beginning.
Unfold the quilt top, trim the excess border, and press the seams. You can miter a quilt’s corner. You just did! This border style is a bit more work than a squared border, but the result is worth the effort.