
“One of the most important things I have learned is that taking the time to prepare quilt tops and backings before beginning the quilting process can make a real difference in the look of the finished quilt.” ~Terry Watson
Whether you are hand quilting, machine quilting or sending your top out to a longarm quilter, there are a few simple things you can do to make the quilting process easier and improve the look of your final project. These are not rules. I am not a badge-carrying member of the Quilt Police. These are suggestions, thoughts and ideas that can make the path to a finished quilt a little smoother.
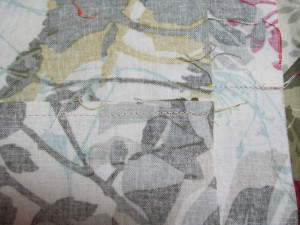
Secured seams at edges of quilt top.
Prepare Your Quilt by Pressing
Pressing, squaring up and trimming threads as you are putting your blocks or sections together are some of the best habits you can get into as a quilter. These habits will make sewing your quilt blocks or sections into a quilt top easier and more relaxing. We have all known the frustration of trying to align blocks or rows that are not quite perfect.
Taking an extra couple of minutes to press (not iron, press) and square up as you go eliminates many of those frustrations.
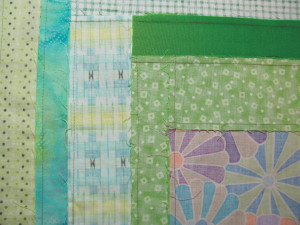
Well-pressed back of quilt top. Threads trimmed.
As you are putting the final borders on your quilt top, secure all of the seams that lead to the outside edge of the quilt. This is especially important for quilt tops with pieced borders. In fact, if you have a heavily pieced border (or no border at all), I recommend that you also run a line of basting stitches around the outside edge of the top within the area that will be covered by the binding. Both of these actions will add stability and keep the seams from pulling apart as you handle, fold and quilt the top.
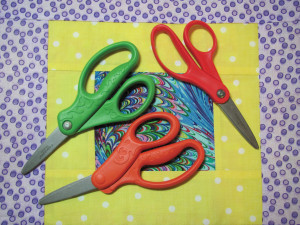
Good quality, blunt-tipped children’s scissors by Fiskars.
A final and careful pressing of the finished quilt top allows you to inspect it before the quilting process begins. As you press the back or wrong side of the quilt top you can clip threads that you may have missed in the piecing process. Dark or medium shades of piecing thread can show through lighter portions of the quilt top when the top is pushed against the batting during quilting. Check for open or scant seams and make sure seam allowances are pressed in the direction you intended.
Stitch-in-the-ditch quilting.
Many of us who learned to quilt in the last 25 or 30 years were taught to press our seam allowances to one side; usually toward the darker fabric. This creates a “ditch” or low side along the seam. If this is your regular method of pressing, and you intend for the quilting to include stitch-in-the-ditch, you want to make sure that you are pressing all of those seams in the same direction. If the seam allowance flips back and forth, the ditch will change sides making it very difficult to stay in the ditch while quilting. Consistent pressing of the seam allowance to the same side will also help keep the seam lines looking straight, especially the longer seams of sashings and borders.
Example of obvious shadow through an appliquéd top.
You can then turn the quilt top over and press the front or right side. Here you can check for possible pleating along the seams, shadow of dark fabrics behind light ones, and see if there is any fullness within the quilt top or borders. Pressing from the front also allows you to see if there are any misplaced blocks. It is much easier to fix these issues now than during the quilting process.

The Big Board ironing surface is perfect for
pressing quilt tops.
A Big Board or extra-large homemade pressing surface can help make this last pressing easier and more enjoyable. I bought an extra-large, heavy-duty ironing board, but it still had an annoying pointy end that cramped my style when trying to press yardage, backings and quilt tops.
I had my husband cut a piece of plywood to measure 50″ x 22″. I wrapped it in heavy-duty plastic (in case I want to use steam sometimes), two layers of cotton batting and some “extra” cotton fabric I happened to have lying around that was large enough. I used a staple gun to secure these layers of materials to the bottom of the board. I laid my new handy-dandy pressing surface on my extra-sturdy ironing board and voilá—a large, efficient pressing surface was born! I can easily remove it if I ever decide to iron something other than quilts. My cousin has her pressing board set up on top of her washer and dryer.
Creating Backings to Prepare Your Quilt for Quilting
If you send your quilt to a long-arm quilter for quilting, she/he will likely tell you your backing and batting need to be 6–8″ larger than your quilt top. She/he needs this extra fabric along the top, bottom and sides because of the way the quilt sandwich is loaded onto the quilting system. The edges of the backing need to be pinned, zipped or clamped to the fabric leaders of the quilting system and the sides are clamped and re-clamped as the quilt sandwich is advanced for quilting.
It is also a good idea to have these extra backing inches if you are hand or machine quilting the top yourself. Safety pinning the extra backing fabric over the edge of the batting and quilt top will help keep it from fraying as you quilt.
It is important to be aware that if the backing is pieced it should be stitched and pressed just as carefully as the quilt top. This can help eliminate pleats and puckers on the back during the quilting process.
Often backs are pieced with two or three lengths of fabric. Remove the selvage edges on the edges you are seaming to avoid extra bulk. I encourage my clients to leave the selvage edge on the outside edges of the backing as it usually makes for a straight, sturdy edge on which to attach to my leaders. If you send your quilts out for quilting you should ask your quilter what she/ he prefers.
The bit of extra time and attention you take when preparing your quilt for long-arm quilting not only makes for a less frustrating quilting experience and a better-looking completed quilt, it also gives you time to think about how you want to quilt your top.
By Terry Watson
One Response to Preparing Your Quilt for Quilting