By: Tricia Lynn Maloney
Fabric dyeing always seemed to be something better left to professionals until one cold and wet Sunday many years ago when my friend Dot taught me how to do it. It wasn’t nearly as difficult as I’d imagined! In fact, it was relatively simple. With some basic supplies and the right chemicals, I dyed gorgeous fabric. You can too!
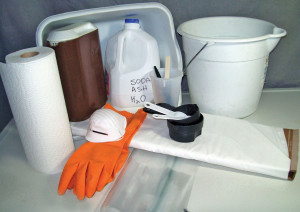
Measuring cups, containers, gloves and dust masks may be found at many large retail stores or hardware stores.
Basic Supplies
(CAUTION: Once you’ve used these items for dyeing, DO NOT use them for food preparation.)
• Plastic dishpan or sweater box
• Rubber gloves
• Dust mask
• Plastic spoons
• Several 12-ounce plastic cups
• 1 set measuring spoons/cups
• Paper towels
• 6 zip-top gallon-size plastic bags
• Gallon jug
• 3 yards 100 percent cotton solid white fabric (PFD—prepared for dyeing—if you can get it)
• Bucket
• Pitcher
Fabric
Fabric usually has some kind of sizing or finishing applied to it. Sometimes these finishes can interfere with the dyeing process. RTD (ready to dye) fabrics have no starches, sizing or finishes applied to the fabric. PFD (prepared for dyeing) fabrics have had no added whiteners and are off-white in color. You may purchase RTD or PFD fabrics. Online sources are given at the end of this article.
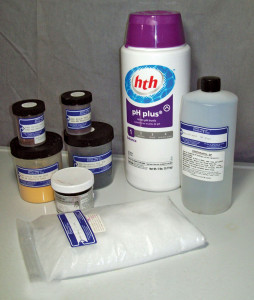
Chemicals for home dyeing are readily available online.
Chemicals Needed
• 1 tablespoon fabric dye powder, color of your choice (Procion MX is recommended)
• Soda ash (available at your local department/pool store in brands pH UP and pH Plus)
• Urea (nitrogen crystals)
• Synthrapol (industrial fabric detergent)
Scouring Fabric
Unless using PFD fabric, you will need to prepare your fabric for the dyeing process. This process is called scouring, and it removes soil and finishes on fabric.
Cut or tear your fabric into six 1/2-yard pieces. Put your fabric into a hot wash cycle in your washer and add a few tablespoons of both Synthrapol and soda ash. There’s no need to dry the fabric.
Preparing Workspace
I prefer dyeing fabric outside so I don’t have to worry so much about the mess, but if you choose to work inside, work in a well-ventilated area and cover all surfaces with plastic sheeting (garages or basements work well). It’s a good idea to wear an apron or old clothes. Make sure all of your supplies are in your workspace and you have access to water.
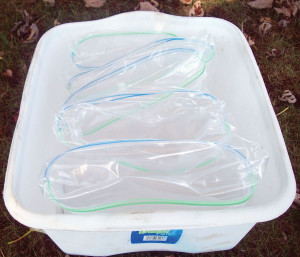
Place the bags upright inside the plastic tubs, ready to be filled with dye.
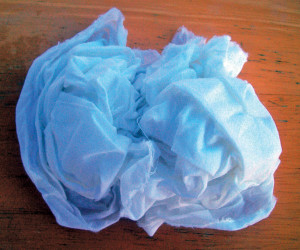
Scrunch the fabric to add a textural look when dyed.
Preparing Plastic Container
Place a layer of paper towels in the bottom of your plastic container. This is for catching spills, and it makes it easy to see if your bags are leaking. Into the paper towel–lined container, place six opened gallon-size bags, labeled 1–6. Roll the top edges down to help them stand up better.
Making Soda-Ash Solution & Soda-Ash Soak
To make a soda-ash solution, put 8 tablespoons of soda ash into a gallon-size jug and fill to the top with very warm water. Cap it and shake to dissolve the soda ash in the water.
To make a soda-ash soak, put 1/2 cup of soda ash into a bucket and fill it up with warm water. When your fabric is done scouring, place it into the soda-ash soak bucket until you’re ready to scrunch it and put it into the dye solution.
Making Dye Solution
PUT ON YOUR GLOVES AND DUST MASK! Measure 31/2 cups of
warm water and 10 tablespoons of urea into the pitcher. Stir until the urea is dissolved. Measure out 1 cup of urea water and set aside for a moment.
Measure 1 tablespoon of dye powder into a 12-ounce plastic cup and add a little bit of the cup of urea water to the dye powder. Mix into a paste. Then add the rest of the cup of urea water and stir until the dye powder is completely dissolved. Remove your dust mask.
Preparing Plastic Bags
Set dye solution aside for a moment and add 2 cups of sodaash solution (from your gallon jug) to each of the six plastic bags waiting in your plastic tub. Do this carefully because the bags will tend to slide down in the tub.
Folding Fabric
There are many ways to fold or wrap fabric for dyeing; but for this project, we’re going to scrunch them all. Scrunching gives fabric a wonderful mottled, organic effect that is perfect for appliquéd leaves and flower petals.
The tighter you scrunch your fabric, the more texture the fabric will have because the dye will not be able to saturate all sections of the fabric evenly. If the fabric is too tightly folded and/or secured, however, the dye will be unable to penetrate into the middle of the fabric. This makes what I call “oops” fabrics.
Don’t scrunch the fabric so tightly that the dye can’t penetrate to the center!
I usually save these mistakes for over-dyeing later, often in a different color so that I get some interesting color combinations. Remove a piece of fabric from the soda-ash soak bucket and squeeze out some of the excess liquid. Lay your fabric on a flat surface and use your fingers to scrunch the edges toward the center of the fabric. It will look something like a rose when you get it squished down into a small ball. Repeat with each 1/2-yard piece of fabric. Set fabric balls aside for a moment.
Adding Dye & Fabric to Bags
To Bag 1, add 1/2 cup of dye solution. Add a piece of scrunched fabric, being careful not to disturb its folds. Now add a 1/2 cup of urea water to the unused dye-solution remaining in the pitcher and stir. This dilutes the dye that will be added to the second bag.
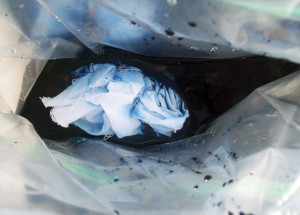
Add the scrunched up fabric to the dyebath.
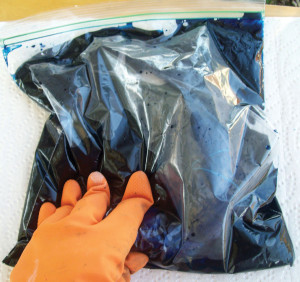
Gently massage the fabric inside the bag.
To Bag 2, add 1/2 cup of the diluted dye solution and then another piece of fabric. Add 1/2 cup urea water to the unused dye-solution remaining in the pitcher and stir. Repeat process for remaining bags 3–6. Each new bag will have half the dye of its predecessor, which will result in six shades of the same color. Now seal the bags, removing as much air as you can. Massage the bags a bit to help the dye get into the fabric. Keep in mind that the more you massage, the more solid the color in your fabric will be.
The more the fabric is massaged, the more solid its color will be.
Cleanup
Carefully dispose of any remaining urea water, soda-ash solution or dye solution down the drain. Rinse all spoons, cups and containers. Wash all surfaces. Make sure all chemicals are tightly closed before storing. Now you can take off your gloves.
Curing Fabric
Allow the fabric to rest undisturbed in the bags of dye for 12 –24 hours.
Washing Fabric
Add 3 tablespoons of Synthrapol to a warm wash cycle in your washer. While wearing gloves, squeeze the excess liquid out of fabric (in the bags) and add carefully to the wash, trying to minimize any splashing. You may need to add more Synthrapol to the second wash cycle. I usually wash dyed fabric three times to remove all excess dye. Dry fabric in dryer on a cotton setting until just slightly damp. Press fabric with iron to remove wrinkles. Trim off any strings. Enjoy your beautiful hand-dyed fabric!
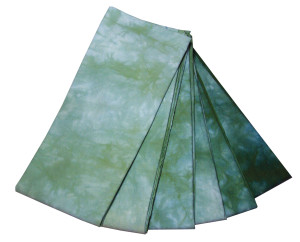
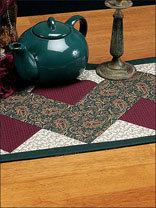
Shown here are the six shades from light to dark green.
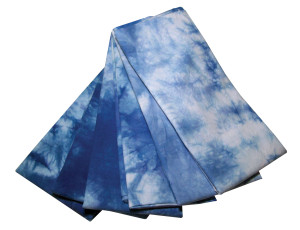
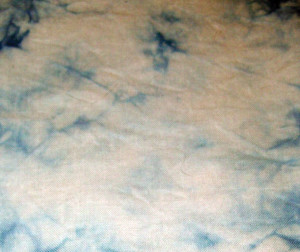
Shown here are blue hues done with the same process.
Fabric Dyeing Resources Fabric, Dyes & Chemicals Dharma Trading Co. www.dharmatrading.com Pro Chemical & Dye www.prochemicalanddye.com Books Hand-Dyed Fabric Made Easy by Adriene Buffington Fast, Fun & Easy Fabric Dyeing: Create Colorful Fabric for Quilts, Crafts & Wearables by Lynn Koolish Fabric Dyeing for Beginners by Vimala McClure Dyeing to Quilt: Quick, Direct-Dye Methods for Quilt Makers by Joyce Mori and Cynthia Myerberg