
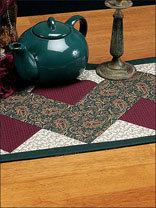
Piecing curved seems can intimidate quilters. For this reason, the New York Beauty is a classic, but often underutilized, quilt block. Fear not — in this technique article, I break down piecing curved seams, and applique that simulates the look of curved piecing, into a series of easy-to-follow steps.
In this article, I describe my method of piecing curved seams. As an alternative to piecing, I present two methods for basting the seams before machine- or hand-appliqueing the curved pieces to the paper-pieced units of the New York Beauty blocks. Try the techniques and see which method works best for you.
Piecing Curved Seams the Traditional Way for New York Beauty Blocks
Step 1. Remove the paper pattern from the paperpieced units.
Step 2. Find the center of the curve on each of the three pieces (A, B/H, and paper-pieced unit) by folding in half and creasing. Mark the crease with a pin.
Step 3. Pin A to the paperpieced unit, right sides together, working with A on top. Pin at the marked curve center point (from Step 2), at the ends of the seam, and where needed in between, gently aligning the edges of the pieces together.
Step 4. Stitch A and the paper-pieced unit together, aligning the pieces at the beginning of the seam by using a pin, stiletto or your fingertips to help keep the curved edges aligned as you sew. Remove pins, if desired, while sewing.
Tip: When sewing and piecing curved seams, leave the needle down and raise the presser foot as needed to adjust and align the edges of the curves.
Step 5. Repeat Steps 3 and 4 by sewing B/H to the A/ paper-pieced unit.
Step 6. Gently press A and B/H away from paper pieced unit.
Appliqued Curved Seams that Look Like Piecing Curved Seams for New York Beauty Blocks
Method 1: Glue Basting for Applique (“Quick and Easy”)
Step 1. Trace pattern piece A onto the matte (non-shiny) side of a piece of freezer paper. Cut the freezer paper template out, leaving the 1/4″ seam on the straight edges, but trimming it from the curved edge.
Step 2. Repeat Step 1, tracing and cutting a freezer paper template for pattern piece B/H.
Step 3. Iron the shiny side of freezer paper pattern A to the wrong side of the yellow batik. Repeat, ironing the shiny side of the freezer paper to the wrong side of either a green grass print batik (H) or blue sky mottled (B) fabric.
Step 4. Trim the fabric to the edges of the freezer paper pattern adding a 1/4″ seam allowance to the curved edge. Leave the freezer paper in place on the wrong side of the fabric.
Step 5. Spread washable fabric glue (either glue stick or quilter’s washable glue baste) on the curved edge seam allowance of pattern piece B/H. Note: Before starting the gluing process, protect your work surface. I use waxed paper or paper towels.
Step 6. Fold the seam allowance toward and over the curved edge of the freezer-paper pattern, gently smoothing with your fingers. If needed, cut shallow slits in the curved seam allowance of pattern piece A to help it conform to the pattern.
Step 7. Repeat Steps 5 and 6 for pattern piece B/H.
Step 8. Apply a small amount of glue to the turned seam allowance of piece A. Lay this glued seam on top of the paperpieced unit with right sides facing up, carefully aligning seams. Repeat for piece B/H.
Step 9. Thread the sewing machine using monofilament nylon thread (.004). Working on the right side of the blocks, machine applique the curved seams of pieces B/H and A to the paper-pieced unit using a blind hem stitch.
Method 2: Thread Basting for Applique that Looks Like Piecing Curved Seams
Step 1. Repeat Steps 1–4 of Method 1.
Step 2. With threaded needle in hand, smooth the seam allowance over the curved edge of the freezer paper on piece A, conforming to the paper shape. Hand-baste the seam allowance in place with running stitches.
Step 3. Repeat Step 2 for the curved seam of pattern piece B/H. If needed, cut shallow slits in the curved seam allowance of pattern piece B/H to help it conform to the freezer- paper pattern.
Step 4. After basting pieces A and B/H, align curved seams with the seam allowance of the paper-pieced unit. Pin in place.
Step 5. Hand- or machine applique the curved seams to the paper-pieced unit with either matching thread or monofilament. Remove the basting stitches after appliqueing.
Remove all of the paper when you are finished sewing the New York Beauty blocks together. Note: Use steam or wet the fabric with water or a damp cloth to remove paper held in place with glue.
Try your newfound skills. Try piecing curved seams to your quilting repertoire — I bet you’ll be glad you did.
2 Responses to Piecing Curved Seams: A Helpful How-To, by Debbie Crawford