Quilted Gift Ideas for Christmas, Babies, Birthdays and Other Occasions

Quilted Gift Ideas for Christmas, Babies, Birthdays and Other Occasions

Quilted gifts offer lots of benefits for both the giver and the recipient alike. The recipient can rest assured that the gift was designed specifically with her in mind. And the giver? For one thing, she gets to experience the joy of quilting — pairing fabrics and patterns, seeing the quilt design come together with every piece that’s sewn in place, and bringing it altogether with batting, backing and just the right stitch pattern. The end result is a quilted gift in which the maker takes pride.

Not only does the quilter enjoy the experience of creating a quilted gift, she gets to experience the joy of giving. As one quilting friend once told me, “I just get a good feeling inside when I give someone something I’ve made.” And that friend should know. She’s made dozens of quilted gifts over the years.

What are some things to remember as you search for quilted gift ideas? Hopefully, these tips will help.

Quilted Gift Ideas: General Thoughts

Probably the most important thing to remember is who will receive your quilted gift. What’s her style? What are her needs? What colors does she have in her home?

Secondly, consider the time frame. How long do you have until the quilted gift needs to be given? If you just received an invitation for a baby shower that’s two weeks away, a crib quilt might not be your best quilted gift idea. You might need to look for something smaller. But if a loved one announces she’s pregnant, making a baby quilt is much more doable because you have months until Baby arrives. We’ll talk more about quilted gift ideas for babies later.

And thirdly, when you’re looking for quilted gift ideas, keep in mind your skill level and opt for a quilt pattern that’s easy for you to complete, especially if you’re a perfectionist. For example, one grandma chose to make baby quilts for each of her grandbabies. For each child, she let the mom-to-be choose the pattern and fabric. One pattern challenged her a bit, and the quilt wasn’t “perfect” in a couple of places. It was still a beautiful baby quilt. The mom loved it, but Grandma didn’t feel great about it.

Remember, making a quilted gift should be a joy for you, not something to stress over. Stretch your quilting abilities with projects that are just for you.

Quilted Gifts Ideas for Babies & Kids

I said we’d talk more about quilted gift ideas for babies and kids. When you’re making a quilted gift for a baby, it’s wise to consult the mom for larger projects that are going to be more costly and time consuming. There’s a better chance you’ll both be happy with the end results, and you can spend time together going to the fabric store and choosing the right fabrics.

If you want to make a baby quilt, Celebrate Baby quilt pattern and Lazy Logs Flannel Baby Quilt are two great options.

They’re both beginner-level quilt patterns with simple designs, and depending on the fabrics you choose, they’re suitable for a baby boy or girl. If your loved one is keeping Baby’s gender a secret, you can always choose neutral colors. Again, it might be a good idea to consult Mom.

Celebrate Baby quilt pattern

Celebrate Baby quilt pattern

Lazy Logs Flannel Baby Quilt

Lazy Logs Flannel Baby Quilt


However, if you use those free baby quilt patterns to make gifts for a charitable organization, be sure to make a phone call or write an email to the organization and ask about their specific needs. You might be surprised. For example, the quilt guild where I live makes baby quilts for our local crisis pregnancy center. We also happen to live in an area with a large Amish population. We were surprised to learn that the pregnancy center needed quilts made of plain fabrics for their Amish clients.

I mentioned earlier to take into consideration how much time before you need to give the quilted gift. If you receive an invitation in the mail today for a baby shower that’s in two weeks, you’re probably not going to have time to make a baby quilt, but you could use your quilting skills and make a smaller quilted baby gift, like the Baby Bibs Twins free quilted baby pattern or Nine-Patch Bibs.

Baby Bibs Twins

Baby Bibs Twins

Nine-Patch Bibs

Nine-Patch Bibs


These free quilted baby gift patterns are small, easy to make, and you might even be able to use scraps of fabric you already have on hand. Pair them with a small toy or set of baby spoons, and you’re ready to go.

Quilted Gift Ideas for Christmas

Oh, Christmastime. There’s just an intangible quality about the holidays that draws hearts toward home. Maybe that’s what makes quilted gifts and other handmade items even more attractive at this time of year. Quilted gifts add a cozy, down-home touch to decor. Plus, you can customize your gifts for the recipients’ tastes, giving them a more personal gift than what the Black Friday sale ads offer.

If you’re planning to give quilted gifts for Christmas or another winter holiday, think about the Christmas decor you know the recipient already has and consider choosing fabrics that will match or compliment it. If you don’t know what your recipient already has or you’re unsure of her personal style, it’s okay to get a little sneaky. Is she on Pinterest? Look her up and check out the things she’s pinned. It might give you some direction when choosing your pattern and fabric.

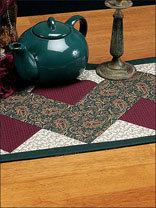
If you’re making quilted gifts for several friends or loved ones, be sure you don’t bite off more than you can chew. Choose smaller gifts you can complete quickly and easily. Quilted candle mats like the Berry Patch I or Four Patch Christmas Star free quilting patterns are great choices.

Berry Patch I

Berry Patch I


Berry Patch II pattern

Berry Patch II


Quilted Gift Ideas for Birthdays, Hostess Gifts, Weddings and Other Special Occasions

Throughout the year there are ample opportunities to give quilted gifts. It’s not a bad idea to make a few quilted gifts ahead of time that you can give when an opportunity arises suddenly. Quilted purses and bags make great quilted gifts for birthdays, hostess gifts, graduations and teacher gifts. Free-Quilting.com has a basic Quilted Tote Bag Pattern as well as one that’s slightly larger called A Walk in the Woods Quilted Bag Pattern.

Quilted Tote Bag

Quilted Tote Bag

A Walk in the Woods Quilted Bag

A Walk in the Woods Quilted Bag


And for kids, there’s the Color Your World Gift Bag pattern. Imagine making that bag ahead of a child’s family vacation and filling it with coloring books, stickers, crayons, snacks and anything else that might help entertain a child on a road trip.

Color Your World Gift Bag

Color Your World Gift Bag


When it comes to weddings and bridal showers, online gift registries give you a great way to research the couple’s style and tastes in decor. Look specifically at the colors they choose for towels, sheets and kitchen linens and incorporate fabrics with those colors into your quilted gift.

If a close family member is getting married, consider a larger project that can become a family heirloom. My great-grandmother made wedding ring bed quilts, like the Double Wedding Ring with Stars free quilt pattern, for each of her grandchildren. They’re now in the hands of the next generation, and eventually, they’ll make their way down into my generation.

Double Wedding Ring with Stars

Double Wedding Ring with Stars


Hopefully by now, you have inspiration and a starting point to explore your own quilted gift ideas. Remember, think about the recipient’s style and needs, consider your timeframe and make sure you choose a quilted gift pattern that will be a joy for you to complete. Happy quilting!

Leave a comment


Quilting Ruler: Measuring Up, Inch by Inch, by Linda Turner Griepentrog

The right quilting ruler is vital for accuracy, and quilters are known for precision in measuring, cutting and stitching. There are hundreds of quilting ruler types and sizes on the market, but what does one look for when purchasing these handy tools?

Quilting Ruler Materials

Most quilting rulers are made from acrylic with thicknesses of 1/8″ to 1/4″, depending on the brand and the intended use. Other rulers are made from plastic, wood or metal, or some combination of those materials. Wood rulers often have a metal edge for strength.

Acrylic rulers are most often clear, but some brands are frosted or tinted for better visibility on dark- and light-colored fabrics, respectively. Tints can be green,  yellow or pink.

Lining Up

The lines on a quilting ruler are the heart and soul of measuring, and, of course, extreme manufacturing accuracy is important. Lines can be painted on the ruler’s surface or laser etched. Many quilters prefer etched lines for durability, as painted lines can wear away with use and abrasion.

Rulers sport a variety of markings — linear markings, grids, angles and block shapes — depending on the intended purpose. Some manufacturers offer multiples of these options on a single tool.

Markings may be on a single side or on both sides of the quilting ruler. Some brands use different color markings on opposite surfaces to ensure visibility for both light and dark backgrounds. Look for rulers with lines marked in black, green, yellow, pink, red and white designed to be used on fabrics of different color or pattern.

How many lines are enough? Rulers come with varying marked increments — some with markings as small as 1/16″, and others with  1/8″ or 1/4″ dimensions. Different dimensions may be marked on different edges or surfaces of the tool and/or with different color inks.

For example, one color may be used for 1/8″ markings, a second color for 1/4″ spacings and yet a third for 1″ and 1/2″ separations. (Photo 1)

quilting rulers & tools

Quilting Ruler & Tools

Rulers can be calibrated in metric or standard measurements, sometimes both on the same quilting ruler, on various edges.

Measurement increments  may differ from one edge of the ruler to the others for clarity — for example, 1/4″ segments may appear on one edge, and 1/8″ distances on adjacent ones.

Some rulers supply measurements reading from both right  to left and left to right for measuring versatility.

Line configuration may not always be the same on all portions of the quilting ruler — some may be solid and others dashed or dotted to help differentiate spacing.

Hold Up

When using a quilting ruler as a guide for rotary cutting, it’s important that it stays in place. Some ruler brands have embedded non-slip material into the ruler underside while others have textured the entire ruler backing for this purpose

Non-slip dots and sheets are available in the notions department of your favorite quilt store if your favorite ruler doesn’t have these stay-put attributes built in — simply stick them onto the underside.

Using a handle attached to a ruler can provide added stability when cutting fabric. Some rulers come with attached handles;  other handles are temporarily  held in place with suction cups.

Screw-in accessory handles can often be purchased separately, depending on the ruler brand.

Safety First

Some rulers offer a 1/2″-tall permanent acrylic safety shield. This extra vertical guard is attached to the tool’s upper surface, near the cutting edge. Fingers should be placed behind it when rotary cutting.

Getting in Shape

Perhaps the most often used quilting ruler is 6″ x 24″, allowing for uninterrupted crosswise rotary cuts as the fabric comes off the bolt. Linear rules come in many other sizes as well, up to yardstick length and beyond.

Rulers also come in squares, circles, curves, triangles, wedges and a host of other specialty shapes.

Single shapes may be screened with attributes other than their main function. For example, most linear rulers also have angle markings for triangles, and some squares also have angles and perhaps smaller squares outlined on them. Most circular rulers also have angles indicated.

Still yet, other rulers are designed for specific functions. Look for wave and scallop edges, multiple corner angles for mitering and binding, hexagon shapes, fringe-cutting rulers with built in slash lines for rotary cutters, ruching rulers and centering rulers with measurements emanating from the center in all directions. Some rulers are only 1/4″ or 1/8″ wide and are designed for adding seam allowances to quilt pattern pieces. These thin rulers can be particularly helpful for quilters who hand piece.

Don’t forget T-square rulers for cutting and aligning two right angles. Some linear rulers offer a lip along one end or side to act as a T-square to assure strip cutting is at right angles to the selvage edges.

If you need to shape curves, look for a flexible ruler. These pliable strips bend and flex to form infinite shapes, then retain that contour for marking.

Be Careful

There are many types of storage tools for rulers — from handy hangers that hold rulers with pre-drilled holes, to slotted wooden holders to keep rulers separated from their neighbors. The separation helps preserve painted markings, which may rub off with long-term use or abrasion.

Be sure to keep rulers out of the sun and never store them in a hot car, as the heat may cause distortion or cracking.

Never press over any ruler with a hot iron unless the manufacturer specifically notes that it can withstand the heat.

Rulers are part of the nuts and bolts of a quiltmaker’s toolbox. Spend some time studying rulers at your local quilt-supply store to learn the benefits of each. While it is good to have a set for basic cutting, specialty rulers also have their place in the quilting room. Take care of your rulers and they will last a long time.

Ruler Tips

If you have vision concerns, shop around for rulers with larger number markings in a color you can easily see.

Rulers often have holes along various lines or angles for easy marking — simply place a pencil or marking-pen point in the hole to leave a dot on the fabric.

If you’re cutting a lot of the same-size strips or triangles, look for low-tack tape or stickers to place on top of the ruler to help you quickly identify the measurements you need. When the cutting is done, simply peel off.

6 Comments


Piecing Curved Seams: A Helpful How-To, by Debbie Crawford

Piecing curved seems can intimidate quilters. For this reason, the New York Beauty is a classic, but often underutilized, quilt block. Fear not — in this technique article, I break down piecing curved seams, and applique that simulates the look of curved piecing, into a series  of easy-to-follow steps.

In this article, I describe  my method of piecing curved seams. As an alternative to piecing, I present two  methods for basting the seams before machine- or hand-appliqueing the curved pieces to the paper-pieced units of the New York Beauty blocks. Try the techniques and see which method works best for you.

Piecing Curved Seams the Traditional Way for New York Beauty Blocks

Step 1. Remove the paper pattern from the paperpieced units.

Step 2. Find the center of the curve on each of the three pieces (A, B/H, and paper-pieced unit) by folding in half and creasing. Mark the crease with a pin.

Step 3. Pin A to the paperpieced unit, right sides together, working with A on top. Pin at the marked curve center point (from Step 2), at the ends of the seam, and where needed in between, gently aligning the edges of the pieces together.

Step 4. Stitch A and the paper-pieced unit together, aligning the pieces at the beginning of the seam by using a pin, stiletto or your fingertips to help keep the curved edges aligned as you sew. Remove pins, if desired, while sewing.

Tip: When sewing and piecing curved seams, leave the needle down and raise the presser foot as needed to adjust and align the edges of the curves.

Step 5. Repeat Steps 3 and 4 by sewing B/H to the A/ paper-pieced unit.

Step 6. Gently press A and B/H away from paper pieced unit.

Appliqued Curved Seams that Look Like Piecing Curved Seams for New York Beauty Blocks

 Method 1: Glue Basting for Applique (“Quick  and Easy”)

Step 1. Trace pattern piece A onto the matte (non-shiny) side of a piece of freezer paper. Cut the freezer paper template out, leaving the 1/4″ seam on the straight edges, but trimming it from the curved edge.

Step 2. Repeat Step 1, tracing and cutting a freezer paper template for pattern piece B/H.

Step 3. Iron the shiny side of freezer paper pattern A to the wrong side of the yellow batik. Repeat, ironing the shiny side of the freezer paper to the wrong side of either a green grass print batik (H) or blue sky  mottled (B) fabric.

Step 4. Trim the fabric to the edges of the freezer paper pattern adding a 1/4″ seam allowance to the curved edge. Leave the freezer paper in place on the wrong side of the fabric.

Step 5. Spread washable fabric glue (either glue stick or quilter’s washable glue baste) on the curved edge seam allowance of pattern piece B/H. Note: Before starting the gluing process, protect your work surface. I use waxed paper or paper towels.

Step 6. Fold the seam allowance toward and over the curved edge of the freezer-paper pattern, gently smoothing with your fingers. If needed, cut shallow slits in the curved seam allowance of pattern piece A to help it conform to the pattern.

Step 7. Repeat Steps 5 and 6 for pattern piece B/H.

Step 8. Apply a small amount of glue to the turned seam allowance of piece A. Lay this glued  seam on top of the paperpieced unit with right sides facing up, carefully aligning seams. Repeat for piece B/H.

Step 9. Thread the sewing machine using monofilament nylon thread (.004). Working on the right side of the blocks, machine applique the curved seams of pieces B/H and A to the paper-pieced unit using a blind hem stitch.

Method 2: Thread Basting for Applique that Looks Like Piecing Curved Seams

Step 1. Repeat Steps 1–4 of Method 1.

Step 2. With threaded needle in hand, smooth the seam allowance over the curved edge of the freezer paper on piece A, conforming to the paper shape. Hand-baste the seam  allowance in place with  running stitches.

Step 3. Repeat Step 2 for the curved seam of pattern piece B/H. If needed,  cut shallow slits in the curved seam allowance of pattern piece B/H to help  it conform to the freezer- paper pattern.

Step 4. After basting pieces A and B/H, align curved seams with the seam allowance of the paper-pieced unit. Pin in place.

Step 5. Hand- or machine applique the curved seams to the paper-pieced unit with either matching thread or monofilament. Remove the basting stitches after appliqueing.

Remove all of the paper when you are finished sewing the New York Beauty blocks together. Note: Use steam or wet the fabric with water or a damp cloth to remove paper held in place with glue.

Try your newfound skills. Try piecing curved seams to your quilting repertoire — I bet you’ll be glad you did.

2 Comments


Prune Your Fabric Panel by Virginia Schaum

Fabric panels are so versatile. A fabric panel plus imagination equals a great quilt.

It is so easy to fall in love with a magnificent fabric panel. Who can resist an animal grouping or a beautiful floral? Fabric panels are generally about 42″ usable width and 24″-36″ long, containing one large design with borders or several small framed designs. Almost every quilt shop or online store offers a variety of fabric panel designs.

For a quick quilting project, a panel may be perfect, but sometimes the print looks like too much design to incorporate into a quilt. It may not lend itself to being surrounded by your favorite quilt blocks.

And then there are some quilters who consider using fabric panels in quilts as cheating. They think a quilt made with a panel cannot be creative. I’m here to tell you that they are wrong!

When you use a fabric panel as a starting point for a quilt, and then allow yourself the freedom to change it, you are creating a one-of-a-kind quilt.

A horse panel was used in one of the samples shown here. Although this panel is no longer available, it is a good example of how you can create something unusual from a panel. You can try this technique with any panel from your fabric collection or from the latest panels available today.

PruneYourPanel_Image1

Allow Yourself to Be More Creative by Pruning a Fabric Panel

Have you ever thought of just pruning the fabric panel to give yourself more creative license?

If you look up the word “prune” in the dictionary, it suggests “cutting off parts for a better shape or more fruitful growth.” Pruning the panel does just that — it provides a better shape for you to grow your project in a unique, appealing way.

Try Pruning a Fabric Panel!

In the fabric panel shown below, the border, some sky and grass were removed to make the wild horses stampede across the quilt. The panel became more elongated and horizontal with greater emphasis on the horses. Instead of the 42″ x 36″ panel I began with, it became a 30 1/2″ x 14 1/2″ panel.

It is important to extend the horse’s head, leg and tail beyond the 30 1/2″ measurement. By removing the superfluous matter, I could focus on the magnificent horses, and as I pieced the quilt, I allowed a horse’s head, leg and tail (plus 1/4″ for turning under) to spill over onto the added Nine-Patch blocks. The pruning also gave me pieces of the original panel to strategically place in the added Nine-Patch blocks, giving a pleasing color transition on the approximately 52″ x 62″  finished quilt.

Instead of horses confined by green/burnt orange borders, the horses have the “run of the quilt.”

So, buy that favorite panel you’ve been eyeing, and literally cut outside the box. Prune your panel and turn it into a truly  original quilt.

Creating a Pruned Fabric Panel Quilt

The sample fabric panel was pruned to a 301/2″ x 141/2″ panel. By eliminating the first row of blocks and sashing strips above and below the panel shown in the Placement Diagram, this border design would work with a 301/2″ x 301/2″ panel.

Other fabric panel sizes may be used by moving units around, or by changing their sizes. That’s what makes pruning panels so much fun — their size can be changed in so many ways.

The following is a quick overview of how to make the sample horse quilt that can be used as an inspiration of how to prune the panel of your choice and grow your own panel-based quilt.

INSTRUCTIONS: Pruning Your Panel

Step 1. Select a fabric panel. Measure the length and width. Examine it with the idea that you want to change it in size to fit your needs and to make a unique quilt. Remember that the size should be divisible by a number that will make an even-sized block. Don’t prune the panel until you complete your plan. Note: Most of the blocks used in the quilt shown finish at 6″ square.

Step 2. Once you decide on a composition for your altered panel, grab a piece of graph paper and a ruler, and draw that size to scale. This will give you the starting point for your finished quilt.

Step 3. Next, plan how you want to expand on the panel to make a larger quilt. If your pruned panel is wider than it is long, you may need to add size to the top and bottom of the panel using pieced or plain sashing strips or blocks.

Referring to the Placement Diagram of the sample shown you will see that a 1″-wide (finished size) sashing strip was added to the top and bottom of the panel. Parts of the pruned panel were used to create squares to make the Star and Square-in-a-Square blocks in the block rows above and below the panel. Another set of 1″wide (finished size) sashing strips were added above and below these block rows.

Step 4. Complete the graph-paper drawing, adding more blocks or strips to make a quilt that will fit your needs — a wall quilt, table runner, lap quilt or bed-size quilt.

Step 5. Figure out the sizes of the pieces to cut for each block or strip based on your graph-paper drawing. Using a clean drawing, add sizes to each section of the drawing, adding 1/2″ to each size to include a seam allowance.

Step 6. Select the fabrics for making the added blocks or strips. Choose colors that will match with the panel and some that will add contrast. For example, in the sample shown, parts of the trimmed panel were trimmed to make 2 1/2″ x 2 1/2″ squares, which were used in the Nine-Patch blocks that make rows around the panel.

Step 7. Figure out how many pieces and the sizes to be cut. For example, the sample uses 24 complete Nine-Patch blocks and four partial blocks that all use 2 1/2″ x 2 1/2″ squares. Each  of the complete Nine-Patch blocks uses nine squares — nine times 24 equals 216, the number of squares needed to complete the Nine-Patch blocks. There are four units that  have six 2 1/2″ x 2 1/2″ squares, adding 24 to the total. To complete all of these blocks you will need  240 (2 1/2″) squares.

Step 8. Once you have figured out everything you need and the sizes to cut, it’s time to cut everything, beginning with the panel. Trim it to size, leaving pieces to extend and spill over onto blocks or borders as described earlier.

Step 9. Complete the pieced units or blocks and stitch the units to the panel, leaving the extended parts loose. Press seams as you stitch.

Step 10. Turn under the edges of the extended panel elements and stitch in place to complete the top.

Step 11. Layer, quilt and bind.

Your Quilt Your Way

The head and part of a leg from the original horse panel were appliquéd to the surrounding Nine-Patch blocks. In this second sample, the lighthouse was trimmed from the original panel.  Notice how it also is extended out into the borders.  A second section has also been trimmed and placed (sailboat) outside of the borders. This gives a more dimensional look.

4 Comments


Making Magic With Half-Square Triangles by Connie Kauffman

When it comes to half-square triangles, many quilters today are familiar with paper products for making them. These products are quick and easy ways to make very accurate triangles, but the biggest drawback when using them is that you have to tear away the paper backing after stitching.

Some half-square triangle blocks can be made using Ta-Da Triangles, a very thin, fusible interfacing with preprinted sewing and cutting lines. The interfacing stays in the finished triangles, thus eliminating the tedious step of having to remove the backing paper before sewing the blocks together. The fusible interfacing is very thin; you won’t even notice it.

The interfacing will not dull your needles, you do not need to decrease your stitch length, and you will not have stitches pulling, which sometimes occurs when tearing off paper foundations. Ta-Da Triangles come in packages to make finished triangles 1/2″ to 6″, and also in combination packages. This product is so fast and easy, I know you will love it!


How to Use Ta-Da triangles

Step 1. Cut the number of half-square triangles needed from the fusible interfacing sheet. Note: It is not necessary to cut out the individual squares from the interfacing. Use the interfacing in strips, squares or rectangles to suit the dimension of your fabric.

Step 2. Cut your fabric pieces slightly larger than the interfacing. Lay your lightest fabric right side down on the ironing board. Next, lay the bumpy side of the fusible interfacing face down on the fabric.


Step 3. Press the interfacing with the iron set to the polyester setting, using a pressing sheet if desired. Press for 8-12 seconds with an up-and-down movement across the fabric (Photo 3).


Step 4. Lay the fused interfacing/ fabric on top of the second fabric, right sides together. Pin the fabric together in the open spaces. Sew along the dotted lines (Photo 4).


Step 5. Using scissors or a ruler and rotary cutter, cut out the half-square triangles on the solid lines.

Step 6. Press the triangles open with the seam allowance toward the darker fabric. Clip any dog ears, and as the company says,  “Ta-Da — you now have purr-fect half-square triangles!”

Leave a comment


Storybook Quilts: Gifts that Keep on Giving by Jane Miller

What are storybook quilts and why are they so special? Let’s take a step back first and talk about quilts and books. They both things that are placed on laps. Both have a way of transporting us, as if by magical flight, to places of memory or imagination. Both are filled with memories of home — the fabric of our lives.

Memories of summer evenings spent eating ice cream and pretending she was at a beach instead of a rooftop inspired quilt artist Faith Ringgold to add words and illustrations of her story-art quilts to create her first children’s picture book, Tar Beach. Since then — for nearly two decades — children’s books with quilts and quilters have flourished. One of the best known books — even to non-quilters — is The Quiltmaker’s Gift, in which a king needs to give away his possessions in order to obtain the one thing he desires the most: a quilt. It’s a lesson in giving.

For one group of quilters, a collection of quilts to go along with beloved books — and their quilted bags — has been a gift to a community, one that can touch anyone who holds a library card. It’s a gift from the quilters that grew for more than a decade.

Over 10 years ago the TriCounty Quilters, inspired by a guild member’s idea to make storybook quilts — small quilts to go along with children’s picture books with stories based on quilts — decided to give the collection to a library.

“I had thought of quilts as only related to a bedtime story. You aren’t just holding a quilt. Children — and everyone — experience these quilts,” says Kay Howard, the children’s librarian/curator of quilts and books that travel throughout Western Pennsylvania to educate the public about quilts — and so much more.

Initially, the librarian had reservations about taking storybook quilts on the road. “After all, what if a quilt has an encounter with chocolate ice cream? I was told, ‘They wash,'” she says.

The storybook quilts project started in 2002 when guild member Nancy Forsythe read a quilt-magazine article about making quilts for children’s picture books. She took the storybook quilts idea to her guild, the Tri-County Quilters. The group of about 25 women, representing the sparsely populated Western Pennsylvania counties of Beaver, Butler and Lawrence, embraced the project.

Guild members felt it would be an interesting challenge to their creativity. Some of the storybook quilts came from published patterns, The Quiltmaker’s Gift had its own line of fabric, but most books, only offered illustrations.

“In some of the books, you didn’t even have the entire quilt pictured,” says Sue Mallen, former president of the Tri-County Quilters. “The challenge was to work from a picture, when you don’t have a pattern,” said Mallen, who did online research on picture book quilts to get ideas for the Hawaiian-inspired quilt she created.

The storybook quilts are stored each in its own portable, pieced bag along with the children’s picture book that inspired the quilt, ready to be checked out to individuals or groups ranging from preschools to senior centers. There is no requirement, except possession of a library card.

The guild’s original purpose had been to educate children about quilts. A half dozen storybook quilts were exhibited at a guild show. But the quilts kept coming in. “We keep finding great children’s books with quilts in them,” says Mallen. Two new storybook quilts were added this past year. “Every year we’ve added to the collection. We still have 14 more books that still need quilts. We’ve slowed down, but we keep finding great new books with quilts in them.”

“We want children to know that you don’t go to the grocery store and buy a quilt. A quilt may be made by your grandmother, and it is a work of art,” says librarian Howard, now a quilt enthusiast.

Each quilt has a story about the special ways it has been used. For instance, high school art teachers use the storybook to teach fabric art. “Most high school art teachers aren’t quilters,” explains Mallen. Spanish teachers use the quilts in connection with books that teach Spanish words. There are books and quilts that teach Hawaiian and Native American words and culture. Middle grade history teachers use Sweet Clara and the Freedom Quilt to teach about the Underground Railroad; The Log Cabin Quilt teaches about a pioneer family in the Midwest and their efforts to create a home.

One of the librarian’s favorite experiences was an afternoon of reading and reminiscing when a senior-citizens group came to the library for a program. It wasn’t just to see the storybook quilts. Howard read the books aloud to the group.

“They enjoyed the storybooks, and they told stories, sat and listened to everyone talk. It was wonderful,” says Howard.

The storybook quilts never stop giving back a sense of appreciation to the quilters. Mallen says, “We know from the stories we have heard that these quilts have been greatly appreciated. It has been great fun to give back to a library, a place that has given so many of us good memories.”

Quilts in Zelienople Public Library’s storybook quilts collection are based on the following books, listed in the order that the quilts were completed from 2000–2010:

  • Grandpa’s Quilt by Betsy Franco
  • The Josefina Story Quilt by Eleanor Coerr
  • Sweet Clara and the Freedom Quilt by Deborah Hopkinson
  • Reuben and the Quilt by Merle Good
  • No Dragons on My Quilt by Jean Ray Laury
  • The Keeping Quilt by Patricia Polacco
  • Shota and the Star Quilt by Margaret Bateson Hill
  • Dan’s Pants: The Adventures of Dan the Fabric Man by Merle Good
  • The Log Cabin Quilt by Ellen Howard
  • The Tortilla Quilt by Jane Tenorio-Coscarelli
  • Who’s Under Grandma’s Quilt by Rachel Waterstone
  • The Quiltmaker’s Gift by Jeff Brumbeau
  • Quilt of Dreams by Mindy Dwyer
  • Eight Hands Round: A Patchwork Alphabet by Ann Whitford Paul
  • The Quilt by Ann Jonas
  • Luka’s Quilt by Georgia Guback
  • Sam Johnson and the Blue Ribbon Quilt by Lisa Campbell Ernst

Additional Children’s Books with Quilt Themes

You’ll find your library as a resource for other books, both old and yet to be released. Here’s a compilation of other quilt books that are loved by librarians:

  • A Quilt for Baby by Kim Lewis
  • Canada Geese Quilt by Natalie Kinsey-Warnock
  • Moonwatchers: Shirin’s Ramadan Miracle illustrated by Anne Sibley O’Brien
  • Papa and the Pioneer Quilt by Jean Van Leeuwen
  • Pieces: A Year in Poems and Quilts by Anna Grossnickle Hines
  • Oma’s Quilt by Paulette Bourgeois
  • A Quilt of Wishes by Teresa Orem Werner
  • Selina and the Bear Paw Quilt by Barbara Smucker
  • Stitchin’ and Pullin’: A Gee’s Bend Quilt by Patricia C. McKissack
  • Tar Beach by Faith Ringgold
  • The Christmas Wishing Quilt by Karen Carr
  • The Handkerchief Quilt by Carol Crane and Gary Palmer
  • The Kindness Quilt by Nancy Elizabeth Wallace
  • The Mountains of Quilts by Nancy Willard
  • The Name Quilt by Phyllis Root
  • The Patchwork Quilt by Valerie Flournoy
  • The Patchwork Path: a Quilt Map to Freedom by Bettye Stroud
  • The Promise Quilt by Candice F. ransom
  • The Quilt Story by Tony Johnston
3 Comments


Machine Applique by Gina Gempesaw

Machine applique is often the quick-and-easy sister of hand applique. There is just one dirty little secret– it’s only quick and easy if you know what to do!

MachineApplique_Page_1_Image_0001

There are so many tools, products and techniques available that it is easy to lose sight of your project needs. Simplify the process by always keeping your project in mind when making choices.

This article features the rawedge applique technique, one of the quickest and most common approaches to machine applique. There is also a general overview of other techniques.

Very briefly, the typical machine applique project consists of four layers — the applique piece(s), the fusible layer, the fabric background and the stabilizer. A lot of the work that goes into successful machine applique is in the preparation.

Preparation begins with choosing the background and applique fabrics and the fusible product. This can be confusing considering all the choices.

Fabrics and Machine Applique

Good-quality, 100 percent cotton was used in this sample, but other fabrics such as wool could be used. Whichever you choose, make sure it is compatible with the background fabric it is appliqued to.

Fusibles

The fusible layer is meant to attach the applique piece to the background or to other applique pieces. Like stabilizers, fusibles come in different weights with most of the heaviest weights reserved for no-sew projects. Lightweight fusibles are preferable for machine applique.

Fusibles come in sheets or rolls and are backed with paper. The applique shapes are traced onto the paper.

Applique Pressing Sheet

An applique pressing sheet is a heat-resistant clear sheet that may be used when ironing shapes made using fusibles. It is also used for fusing the layers of designs.

Put the machine applique pattern under the sheet, layer the shapes on top of the sheet, one at a time, and fuse together as you go. The fusible product does not stick to the sheet.

When completed, a many-layered design can be positioned and fused to the base in one step.

Preparing Fusible Shapes

To use a fusible product, trace the reversed shape onto the paper side of the fusible, cut out the shape roughly 1/4″ away from the traced line. Place the fusible shape onto the wrong side of the fabric and fuse in place. Many patterns are given in reverse, ready to use for fusible applique.

Be careful not to touch the iron directly to the glue side of the fusible or you will make a mess as the product bonds to the iron. The fabric now has a paperbacked fusible attached.

Carefully cut along the traced line of the applique shape.

Next, carefully peel the paper backing off the piece, making sure the fusible layer remains stuck to the fabric. This piece is now ready to be fused onto the project background.

Place the shape on the background and, when satisfied with positioning, fuse in place. When the applique motif has many layers, begin fusing with the layer closest to the background fabric, unless you have pre-fused the layers together.  Many machine applique patterns have numbered pieces, which is helpful for proper layering when there are many layers to a pattern.

Tip: Use an applique pressing sheet between the iron and your project as well as between the ironing board and your project to prevent accidents with the fusible product adhering to the iron or the ironing surface.

Machine Applique Stitching

Once the pieces have been fused in place, they are ready for stitching. You need to choose the thread and stabilizer you wish to use. Today there are many choices for each product.

Thread

At this point, think about your project again. Consider the threads you may want to use. With so many choices available, this is a complicated decision. You have the option of using invisible or fine matching thread to make invisible stitches or stitches that will blend with the fabric. If you would like the stitching to stand out, you may use metallic, heavyweight or contrasting threads.

Tip: For a quick-and-easy project, the thread of choice is typically a 50- or 60-weight cotton thread with a color that closely matches the appliqué piece.

Stabilizers

Stabilizers are used to keep the applique stitches from puckering the fabrics during stitching. A medium-weight stabilizer is great for most stitches, but if using certain dense stitches, such as a satin stitch, a heavier-weight stabilizer may be appropriate.

Most stabilizers come packaged in sheets or rolls in a variety of sizes and types. They can be dissolved with heat, water or torn away when stitching is complete. After testing a variety of types, most people develop personal favorites.

After the shapes have been fused in place, the stabilizer is applied to the wrong side of the background material. Because there are so many products available, no general instructions can prepare you for this application. Refer to the manufacturer’s instructions for use of these products.

Machine Stitch Choices

The next decision is which stitch do you use? The easy answer is whatever stitch you want to use! Common stitches used in machine applique include the straight, satin, buttonhole and zigzag stitches.

Straight Stitch

A simple straight stitch sewn close to the edges of each shape is the fastest and easiest stitch choice for machine appliqué. It does not cover the raw edges of the fabrics, but does secure the pieces in place.

Tip: To avoid thread breakage, be sure to use the correct size machine needle for the thread of choice. For example, when using metallic thread, use a needle designed to work with metallic thread for the best results.

Satin Stitch

The satin stitch tends to stand out and is great when you want to emphasize shapes. You may adjust the width and length of the satin stitch depending on how much you want it to stand out in the finished project. Use this stitch to bring out the color and shine in the prettiest of threads.

Because it is a dense stitch, it takes a long time to complete. If you do use the satin stitch, remember to take frequent breaks for yourself as well as for your machine.

Buttonhole Stitch

The distinctive buttonhole or blanket stitch was often used to applique shapes, such as Sunbonnet Sue, in the quilts our grandmothers made. This stitch is commonly used today in the more primitive, country or retro projects. Typically found in wool projects, this stitch simply looks handmade. Though black is a common thread color when using the stitch, any color will work.

Zigzag Stitch

The zigzag stitch is probably the quickest and easiest to use. A versatile stitch, you can use it with most types of thread.

Your Sewing Machine

Evaluate your sewing machine. Are the stitches you want to use for your machine applique quilt project available on the machine?

Check the tension and practice your chosen stitches with the right needle and threads on a scrap project using similar fabrics to the one you will be stitching.

You Are Ready to Machine Applique

Finally, you are ready to stitch. Starting and stopping a stitch can be tricky.

For clean starts and stops, first position your project under the needle at the starting point and, with a quick needle down and up, pull the bobbin thread up to the top of the project. Hold on to the top and bobbin thread tails with one hand as you start stitching. At the end point of the stitching, leave about 6″-long thread tails. With a hand needle, thread all the tails to the back of the project to knot them off before trimming the excess threads.

Tip: Use a self-threading needle to take those tails to the back of  the project.

To maintain consistent stitching, be aware of where to pivot your project for best results. Work slowly while you learn  where the stitches need to go until you are comfortable with the process. Another type of stitch  may require you to pivot your project at different points in the stitching process.

Practice your machine applique and you will be well on your way.

Tip: Practice, practice, practice! Successful machine applique results from lots of time spent getting to know your machine and the tools and products used in machine applique. It’s important to take the time to perfect your skills.

Leave a comment


Enhance the Art Applique on Your Quilt Projects with Copic® Markers, by Carolyn S. Vagts

Do Copic markers and quilt projects really work well? The answer is, yes! And here’s why. Sometimes you just can’t find the perfect  fabric when working on an applique quilt. No matter how hard you try and no matter how big your  stash is the right fabric or texture just isn’t there.

I have spent many days going from quilt shop to quilt shop trying to find a certain color, a look or a texture to finish  a quilt projects. I guess you can figure out that I have a few unfinished projects lying around. Necessity is the mother of invention, and because I am a very organized person and clutter really annoys me, finishing up things has been at the top of my list.

I am a fusible-applique artist. That is what I love to do — it is my passion. I begin by sketching my project on paper with a pencil. As I do this, I sort of know what I want the color palette to be. I have boxes of batiks sorted by warm and cool colors, and also by size. When you are an applique artist you see leaves or buds in the smallest of fabric pieces. I find it very hard to toss a scrap of batik knowing it could be the perfect fit for a future project. As hard as I have tried to own every last batik out there, there are times when I still do not have the perfect piece.

Recently, I discovered Copic markers. I am not beyond enhancing fabric to get what I want; after all, it is all about the end result. I was recently working on a bouquet of appliqued flowers and needed a darker shade of orange for the center of a lily. I dug through all of my boxes and could not find what I needed. There, sitting on the top of my fabric cubbies, was a set of new Copic markers I had requested for a product review for Quilter’s World magazine. This was the perfect time to test them. (I try to test all our Favorite Finds. I can’t recommend products unless I know they do what they say they do.)

I opened the package of Copic markers, checked out the tips, and I must say, I was very impressed with the quality. With a bit of hesitation, I began to shade the center of one of the lilies. It worked wonderfully. I moved on to another flower and then to another. I loved the way these markers flowed onto the fabric. The paintbrush tip allowed me to get into tight areas. I wanted to do more and more. Unfortunately, I was limited by color. I needed more Copic markers! That, I could fix. But, my point is, if you are looking for a new way to enhance your art applique, this is a product that is well worth a try.

I am always looking for new products to get the desired results I want. Copic markers are a wonderful way to add the finishing touches. I have added a lily art applique pattern to this article for those of you who might want to try Copic markers with quilt projects. It’s very easy, so go ahead and dig through your scraps and play along.

The lily is one of the flowers from the bouquet of flowers I was working on. It is an ideal applique art pattern on which to play and test Copic markers. Lilies have so many possibilities in color and in texture.

EnhanceYourApplique_Page_4_Image_0001

Trace each section of the lily pattern onto the paper side of the fusible web following manufacturer’s instructions. Note that the lily pattern has been reversed for fusible applique. Be sure to leave at least 1/2″ between the pieces. Cut the pieces apart for placement on fabric.

Pick out your fabrics for the lily petals and the stem from your fabric stash.

Fuse the traced and separated petals and stem to the wrong side of the fabrics and cut out on the marked lines. Remove the paper backing.

Position all your pieces on the background in numerical order (starting from the background and working to the foreground). When you are happy with the way it looks, fuse into place. Remember: This lily art applique pattern is just a guideline, and you can move it to suit your taste.

I always sandwich my quilt backing, batting and quilt top together before I begin to stitch down my applique on an art quilt. It saves time and looks much better. The stitches tend to sink into the design, not sit on top. You may prefer to do the appliquee stitching before this process — it’s up to you.

With threads to match your fabric choices, reduce your stitch length to 1.8 or 1.9 and stitch very close to the edge of each  piece to secure in place. Reducing your stitch length and going slow will help you make nice smooth curves as you stitch the petals  into place.

When you have stitched all the basic pieces in place, it’s time to play with the Copic markers. Decide just where you need to shade for a 3-D look. Shadows will give you that look. Decide where your light source is coming from to determine where to shade. When using Copic markers to shade, start with light colors and work your way to darker shades. Keep in mind that you can always add color, but you can’t take it away.

Play with the colors. Lilies come in many different color combinations that you can’t find in fabric. You will be amazed at all you can do with the markers. Experiment. Since you are only using scraps it doesn’t matter if you make a mistake. You can try it again.

Once you are happy with your shading, add some thread play. You can add texture and detail on top of what you did with the Copic markers.

I have always wanted to applique a stargazer lily, but finding the right fabrics, textures and colors has always escaped me — until now. Copic markers have given me the resources to add those elements. My test pattern is shown here. I am happy with the result and am excited to keep experimenting with Copic markers on fabric.

Think of using Copic markers as a way to get the colors you are missing in your stash. Using markers to enhance your applique is just another way to get the effect you want in your designs. I know that I will make sure to have these markers on hand in my studio. Who knows when I will need them?

Think of the possibilities — an endless stash and any texture you could possibly want, all with a touch of Copic markers. This is an area I intend to explore further to try out new techniques. I will be sharing these techniques with you in future articles, so if this is an area that interests you, be sure to try Copic markers for yourself, and watch for more ways to use them in the future.

Tips:

Use a MircoTec 10/70 or 8/60 needle when doing fusible applique. It is a very sharp needle and makes a very small hole.

Always bring your bobbin thread to the top before you start to stitch. This will eliminate tangles on the back of your quilt.

Leave a comment


Embellishing Your Quilting Projects with Fabric Flowers

Embellish your quilts and other projects with fabric flowers to make the design your own. Fabric flowers have been a trend in the quilting world in recent years. We’ve seen fabric flowers everywhere — from quilted purses and totes to wall hangings, pillows and even on bed quilts. Fabric flowers can cross over into other crafts as well. I’ve seen the use of fabric flowers in paper crafting and in sewing.

quilt-flower_02

The fabric flower on the quilted pillow above was created using a Clover Kanzashi Flower Maker and the pattern templates given in this article. You can make any leftover quilt block into a very special pillow by adding a few flowers.

What is so great about embellishing with fabric flowers? You can coordinate them with any quilting project. All you need is the fabric, and not a lot at that, and the desire to create. Your imagination is your only limit. You can take a very simple quilting project and make it as one of a kind as your personality.

When it comes to making fabric flowers, you have options for your method. I’ve seen them made from pattern pieces and with Clover’s product, Kanzashi Flower Makers, which is actually a form of fabric folding. Either method is easy. Your personal preferences and the overall look you are trying to achieve help you decide which method is right for your quilt or other project. I’ve found by combining the two techniques, you can get some fun and interesting results.

Clover’s Kanzashi Flower Maker offers a wide variety of petal styles to choose. It allows you to make just about any fabric flower you like. Plus you can layer or mix them for even more easy, fabric flower fun.

I received a couple samples from Clover. Once I started playing with the Kanzashi Flower Maker, ideas started exploding and before long I had a pile of fabric flowers sitting before me. I started making fabric flowers with plain tonal fabrics from my stash, and then moved on to wild prints. Small pieces of leftover fabrics worked perfectly. With this product, it’s easy to make perfect fabric flower petals every time.

The more I played with these fabric flowers, the more my ideas grew. I hope to live long enough to complete at least half of them. My weekend yielded the two quilting projects pictured and many more that are now waiting for my next project. I now have a box to store these extra fabric flowers until the next time I need a special touch or embellishment.

quilt-flower_03

You can also recycle buttons from Grandma’s button jar and using them for the centers of your fabric flowers. Or add the “something old” to a bridal garter. What a special touch that could be for a bride—a nice sentiment to keep loved ones close. Or maybe you want to use fabric flowers add a special touch to a remembrance project such as a memory quilt. Special touches like these make wonderful memories.

Next time you think your quilt project might need something more, consider adding a fabric flower or two — or a whole bouquet! Embellishing with fabric flowers is a great way to use fabric scraps, give a one-of-a-kind look to your quilting project, and it can be very inspiring. You never know what ideas you will dream up. Fabric flowers can be fresh new source of creative inspiration. Go ahead: Breathe in and give them a try!

quilt-flower_04

Here’s a Tip: How to Make Fabric Flowers

To make the fabric flower on the pillow shown, use the petal template and the circle below. With right sides together stitch the 1/4″ seam allowance, turn and press. Gather the petals with a basting stitch and pin into place. Applique the center circle using your favorite applique technique. Be creative.

CircleTemplate

FlowerTemplate

The leaf template was used on both fabric flower projects pictured. The templates are meant as a source for your creative embellishing, not as pattern to be given. This is an article about making your quilting projects your way.

LeafTemplate

By Carolyn S. Vagts

Leave a comment


Half-Square Triangles Made Easy by Connie Kauffman

Have you ever been blown away at the intricacy and beauty of a quilt made with half-square triangles (HSTs)? Whether they are large or small triangles, few or many, they look amazing. Now, you can do this too! There are several quick and easy methods to creating half-square triangles, so do not hesitate to create your own triangle treasures.

CherryBaskets

CREATING HALF-SQUARE TRIANGLES
If your pattern calls for a few blocks with HSTs, you might want to create them with this simple method:

1) Cut two squares 7/8″ larger than the final size of the block you want. For example, if you want you block’s final size to be 3″, then cut 2 squares 3-7/8″.

2) On the wrong side of the lighter fabric square, draw a line from corner to corner across the diagonal.

3) Pair the marked square right sides together with a darker square with the marked square on top.

4) Sew 1/4″ on each side of the drawn line. Be careful not to stretch the squares, since the stitching is done on the diagonal bias of the squares.

5) Cut the squares apart on the marked line.

6) Press the two units to the right side with seams toward darker fabric to complete two identical half-square triangles.

7) Clip off the dog-ear triangles.

ELIMINATE MARKING

If you would prefer not to mark the squares, a quilter has developed a tape that will help out immensely. Tiger Tape (www.tigertape.com) is a 1/2″-wide tape on a roll. Place the tape across the diagonal of the top square with the centerline aligned with the corners and then sew at the edge on each side of the tape. Then, remove the tape and cut between the stitched lines. The tape may be used several times before eventually losing its adhesiveness.

GettysburgRevisited

HELPFUL PRODUCTS

There are many products on the market that enable you to make quilts using accurate half-square triangles. Personally, I prefer the printed products. Below, I’ve listed five recommendations, all with similar sewing techniques, using a paper or fusible interfacing that have printed lines for easy sewing and cutting, with easy to follow instructions. Also, all of them place the lighter fabric against the paper or interfacing, so seams are pressed to the darker fabric when pressed. Just sew on the dotted lines and cut on the solid ones. If necessary, press and remove the papers. This method makes it extremely easy and very accurate.

Thangles™

Thangles papers come in narrow strip packages and are to be used with fabric strips that are 1/2″ wider than the finished-size block you want. The packages come in 15 different sizes to make triangles from 1/2″ – 6″. These paper-strip patterns can be less cumbersome to handle, and are great to use with leftover or precut fabric-strip rolls that are popular today. The papers are thin enough that you can use a regular stitch length to sew, and they are easy to tear off after use. (www.thangles.com)

Triangles on a Roll

Triangles on a Roll is a handy product with paper patterns in sizes 1″, 1-1/4″, 2″, 2-1/2″, 3″, 3-1/2″, 4″, 4-1/2″, 5″ and 6″. Each roll is for one size and will make hundreds of half-square triangles. You cut the number of squares you need from the roll as you need them. One roll will last a long time. These are especially good to use when you know you will be making one or two size units for many projects. The papers are thin and easy to remove. (www.trianglesonaroll.com)

Triangle Paper by Quiltime™

Triangle Paper patterns come on a fold-out sheet of thin, manila-colored, 11″ x 17″ paper that fits the size of half a fat quarter and are very easy to tear. The papers come in sizes starting at 3/4″ with 1/4″ increments to 2-1/2″ and with 1/2″ increments to 5″. There is also a variety package with three sheets of each size.

Little Triangle Papers come in 7″ x 7″ sheets — about 25 sheets per package. (www.quiltime.com)

Ta-Da Triangles™

Ta-Da Triangles are printed on a thin fusible interfacing. You press the interfacing directly to the fabric, which eliminates the need to tear off any paper product. The fusible is very soft and pliable and stays on the finished square. This also helps keep the square stabilized and reduces fraying of the center seams. This product is printed to fit a full fat quarter of fabric.

Ta-Da Triangles come in packages for sizes starting at 1/2″ with 1/4″ increments to 6″. There are also four different combo packages with several sizes in each. (www.TaDaTriangles.com)

Triangulations™ 3.0

This is a CD containing patterns to make half-square triangles starting at 1/2″ with 1/8″ increments all the way up to 7-1/2″. You can find just about any size you want on the CD, copy them onto your computer, and print as many patterns as you need. The CD is easy to use and the instructions are easy to follow. Another great advantage to this product is that it also includes patterns for quarter-square triangles, in multiple sizes, as well. (www.bearpawproductions.com)

Finally!

Whatever method you choose to make your own half-square triangles, remember there’s no product that can substitute for quality fabric and accurate stitching. Once you have tried many methods, you will probably find your favorite that will give you perfect results every time. After that, you will be making quilts using half-square triangles more often in the future.

Several projects in this issue use half-square triangles. Even though they may recommend one method over another, substitute your method of choice; remember to cut the fabric pieces the sizes needed to result in the correct-size unit for success.

2 Comments